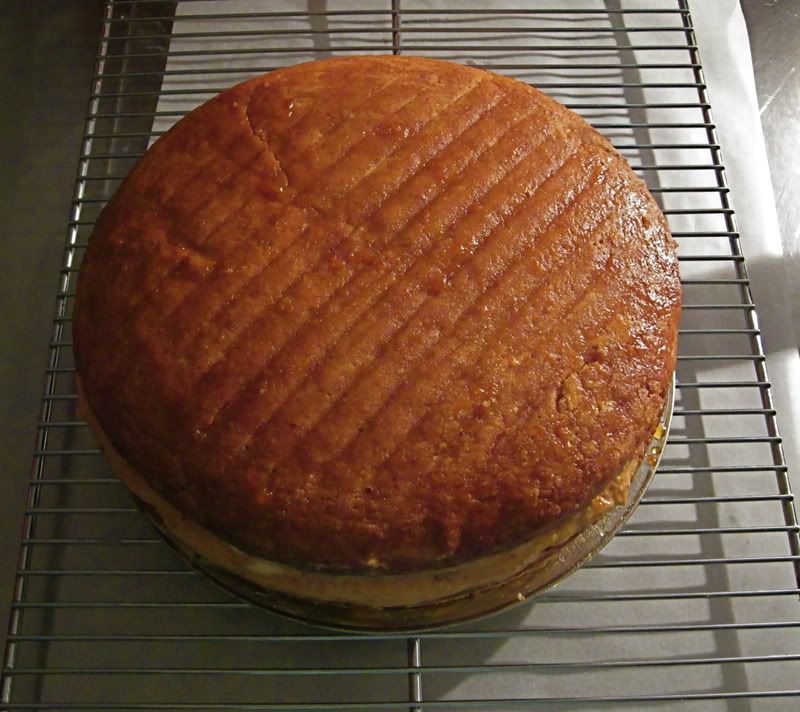
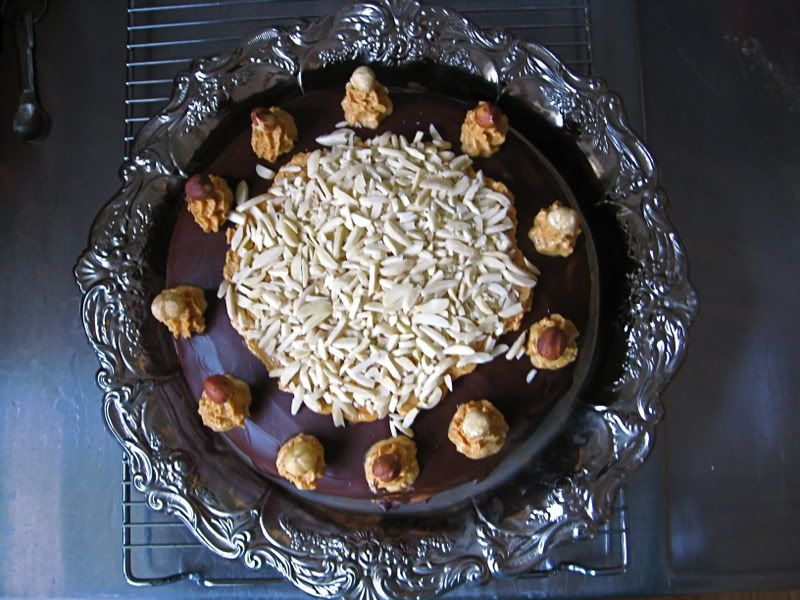
Sunday, November 23, 2008

Roasted Cauliflower, Walnuts and Queso De Cabra Salad


This recipe rocks. I remember a couple of years ago they tried making cauliflower the 'it' vegetable: cauliflower risotto, cauliflower pasta and to be honest, I wasn't sold. To me, cauliflower has always been a poor mans broccolli.

I changed my mind when we found this recipe in a Gourmet Traveller Magazine. It's from the 2007 Christmas issue from an editorial about the truly talent brothers: Andrew & Matt McConnell (chefs of restaurants Three One Two and Bar Louringha respectively) It's a Christmas staple on their family table and I think it will be on ours too in the many years ahead.

If you're looking for a new Christmas salad, I suggest giving this a go..

Ingredients:
1 tablespoon coriander seeds, dry roasted
1 cauliflower, cut into large florets
2 tablespoons olive oil
50g (1/2 cup) roasted walnuts
1/2 spanish onion, thinly sliced
2 cloves of garlic, thinly sliced
1/2 cup of flat leaf parsley leaves, coarsely torn
Finely grated rind and juice of 1 1/2 lemons
Shaved Queso de Cabra cheese. If you can find this particular Spanish goats cheese, any soft goats cheese will do (try for Italian next)
extra-virgin olive oil, to serve

Preheat oven to 200ºC

Place coriander seeds in a mortar and using the pestle, finely crush them and combine with cauliflower, olive oil and 2/3 of the walnuts.

Place in a heavy based roasting tray and roast for 25 minutes or until slightly brown and just beginning to soften.

Cool slightly then add the onion, garlic, parsley, lemon rind and juice.

Season to taste with sea salt and freshly ground pepper and toss gently. Scatter cheese over cauliflower before serving, either warm or at room temperature.

We recently had this salad with some BBQ lamb cutlets and a refreshing ale on a Sunday afternoon. Just delightful.

Healthy Muesli

Occasionally I get the urge to detox. To be honest I've only gone through with it a few times and although it's challenging not having alcohol, salt and sugar for weeks on end, you do feel good for it. Recently I'm more inclined to try and eat a few really healthy meals a week and go without grog at least 3-4 times a week. This enough of a challenge for me right now.

I think the easiest healthy thing to eat almost daily is muesli. With this recipe, not only do you get a kick out of making it yourself, it's healthy and filling. The recipe below is from the book - The Liver Cleansing Diet by Dr Sandra Cabot (the one with the daggy ginga Doctor on the cover)


Ingredients:
2 cups rolled oats
1/2 cup of raisins or sultanas
1 cup of rye or rice flakes
1/2 cup sunflower seeds
1/2 cup chopped dried dates
1/2 cup chopped walnuts
1/2 cup chopped roasted almonds
1/4 cup pepita seeds
1/2 teaspoon ground cinnamon
1/4 teaspoon ground nutmeg

Combine and mix all ingredients in a large bowl. Place in an airtight container and store in the fridge.

Serve with your fruit of choice and yoghurt. I like mango with vanilla yoghurt or pear and strawberries. Yum

Will post a pic soon..

Saturday, November 22, 2008

Vegetable and Lentil Pie


This is the kind of pie you would make for the following reasons -

1. Perhaps you feel you haven't eaten many vegies lately?

2. It's a Sunday, it's raining and you have a bottle of wine giving you 'drink me' vibes

3. You have a sweet chilli sauce addiction and you need a vessel to assist our craving

4. There are two of you in the kitchen and you feel like getting busy

Well, I answered 'all of the above' when I thought of sharing this recipe. This Vegetable and Lentil Pie recipe originates back to my vegetarian Sydney days, most likely when living with Stacey and Luke Dwyer in Camperdown. It's changed over the years - vegetables have been ditched, new vegetables have come on board. Basically, there is no rule to what you can use.

This is my latest version and this is what you will need -

2 red capsicums
2 medium zucchinis
1 bunch of English spinach
1 medium eggplant

3 large field mushrooms
2 cloves of garlic

1 large sweet potato
2 tablespoons of butter
3 tablespoons of milk

1 cup of green lentils
1 handful of parsley
1 zest and juice of a lemon

200g ricotta
4 tablespoons of tomato paste
2 sheets of puff pastry
Parmesan cheese to sprinkle on top
Olive Oil

Ok, first of all, get yourself a big glass of wine. You're going to be chopping, roasting and assembling for at least a couple of hours.

Preheat oven to 180ºC

If you're cooking with a friend, divy up the following instructions, otherwise you could do it in this order -

Slice the eggplant and zucchini into 5mm slices (circles for the eggplant, lengthways for the zucchini). Place them on a baking tray and drizzle with olive oil and season with salt and pepper. Add the red capsicums whole onto the same baking tray. Put in the oven for approximately 15 minutes until they are browning and mostly cooked. You may need to turn them occasionally to avoid them sticking to the tray. Once cooked, set aside.

When the red capsicum skin is getting burnt and they are looking ready for the peel, removed them from the oven and place in a plastic bag for 5 minutes. Then peel the capsicums and slice thickly. Set aside.

Peel the sweet potatoes and chop into chunks and place in water in a pot. Bring water to the boil and simmer until they are cooked. Drain them, place in a bowl and mash together with 2 tablespoons of butter, 3 tablespoons of milk and season with salt and pepper. Put a plate over the bowl so the steam will keep them warm. Set aside.

Place 1 cup of lentils in 3 cups of water. Bring to boil and then simmer on low heat for approx. 20 minutes or until the lentils are soft. When cooked, drain the lentils and place lentils in a bowl. Add chopped parley, zest and juice of lemon and season with salt and pepper. Set aside.

Slice the field mushrooms and saute in some olive oil and garlic. Once cooked, set aside.

Wilt the English spinach in some hot water and roughly chop. Set aside.


Now you should have all your ingredients ready to go for the assembly, the best part.

Grease a rectangular baking dish with butter and line with the puff pastry. Put in the oven for around 5 minutes until it gets a little light brown in colour. It may puff up (it wouldn't be called puff pastry if it didn't!) so just pop the puffs with a fork.

Now for the assembly. Again, there are no rules to the order of layering. Spread 4 tablespoons of tomato paste on the bottom, then the ricotta.


Then add layers of all the vegetables and lentils and finish with the sweet potato mash.


Sprinkle grated parmesan cheese on top and put in the oven for approximately 30 minutes. Test with giving it a poke and making sure it's heated all the way through.

And there you have it, vegetable and lentil pie! Serve with sweet chilli sauce and more wine of course.

Lemon Yoghurt Cake with Peach and Blueberry Salad


There's something weird about baking with yoghurt but it surprisingly works well. This recipe is from Neil Perry's Good Food Cookbook, a regularly used book in our household. Neil serves it with a peach and blueberry salad and whipped cream - amazingly delicious. We tend to serve it with any kind of fruit we have hanging around the house. For photo purposes, it was strawberries. It's also a winner with the kids. There's a little sugar involved but not too much. Jed is a big fan.

Ingredients:
4 large eggs separated
100g caster (superfine) sugar
3 tablespoons of plain flour
400g Greek style yoghurt
grated zest of 1 lemon
juice of 1 lemon
icing sugar (for dusting)

Peach and Blueberry Salad
6 ripe peaches cut into wedges
1 cup blueberries
1/4 cup caster (superfine) sugar
grated zest of 1 lemon
juice of 1 lemon
1 vanilla bean

Preheat oven to 180ºC.

Grease a 22cm spring form cake tin with butter and line base and side with baking paper.

Beat eggs yolks with sugar to a thick, pale cream.

Beat in the flour, then the yoghurt, lemon zest and lemon juice until it is thoroughly blended.

Whisk the egg whites until stiff and fold them into the yoghurt mixture in two batches.

Pour mixture into the baking tin and bake for 50 minutes or until cooked when tested with a skewer.

Check cake after 30 minutes and cover with foil if over browning.

Unclip spring form tin and slide the cake onto a wire rack to cool.

Meanwhile, place the peaches, blueberries, sugar, lemon zest and lemon juice into a bowl.

Split the vanilla bean lengthways and scrape out the seeds. Add these to the fruit salad and toss all ingredients until combined.

Cover the bowl and set aside at room temperature to macerate for several hours.

Transfer the cake to a serving plate and dust with icing sugar.

Serve wedges of cake with peach and blueberry salad and a dollop of whipped cream.

Sunday, November 16, 2008

Miso Eggplant with Udon Noodles


I've been very naughty not contributing enough to this food blog. No excuse, just plain naughty. So to make up for it, I'm going to upload 5, yes 5! new recipes this week.

Recipe No 1.... Miso Eggplant with Udon Noodles. This is a weekday winner. Quick, healthy and delicious. This recipe makes enough for 2 peeps.


Ingredients

1 medium eggplant
1 knob of ginger, finely chopped
1 red capsicum
1 medium head of broccoli
Handful of green beans
Handful of cubed tofu (Mr Lee's savory tofu is my preferred)

Miso simmering sauce ingredients -
2 tbsp white miso paste
2 tbsp tamari or light soy
2 tbsp mirin
2 tbsp white sugar
1 cup water

Garnish
1 tbsp of toasted sesame seeds
1 tbsp of toasted pumpkin seeds
2 spring onions, finely sliced

What to do -

First get your garnish ready. Place the seeds in a hot pan and dry fry until they are golden. You can add a little soy sauce to make them a little salty if you like. You'll only need around 2 tbsp of this mixture for the garnish but I always like to make more and store in a glass jar in the fridge. You can sprinkle on most asian dishes. Finely chop the spring onion and set aside.

To make the delicious simmering sauce, combine all the sauce ingredients in a glass and mix together. It should taste quite sweet but a little salty too.

Next, chop up all your vegies and tofu into chunky pieces.

Heat 2 tbsp of oil (olive, vegetable oil, whatever you have) in a pan and fry the chopped ginger and eggplant off, stirring constantly to prevent it from sticking. Once eggplant is ever so slightly soft, pour in the simmering sauce. Bring to the boil then reduce to low heat. Pop on the lid and allow to simmer for 10 minutes.

Next, get a bamboo steamer (or something similar) and put in the chopped broccoli, beans and capsicum. After 5 minutes of simmering, place the steamer on top off the saucepan.You only want to lightly steam your vegies to keep their vibrant colour and crunch. Add the chopped tofu to the miso eggplant when you have around 3 minutes of simmering time left.

While you are simmering and steaming, place the udon noodles in boiling water for approximately 5 minutes or until cooked. Drain and set aside.

Now for the assembly. Place noodles in a bowl. Spoon on top your miso eggplant/tofu mixture. The eggplant should be very soft and almost falling apart and the sauce quite thick. Then place your steamed vegies on top then garnish with a tablespoon of chopped spring onions, the toasted seed mix and lightly drizzle with sesame oil. Yummo.

Hope you enjoy!

Sunday, November 9, 2008

sneaky brownies

i have been subscribing to this blog for a very long time. heidi swanson is an amazing cook, she has a wholefood approach and cooks with mostly natural ingredients. i came across this recipe when searching for gluten and wheat free baking recipes. i have been meaning to try it for a very long time....and now i wish i tried it a very long time ago..as it is amazing! i don't think i'll ever make brownies any other way..why bother? protein in a brownie? gzzeeesh????

black bean brownies

i found it hard to get agave nectar so i used an organic raw honey 1:1 -raw is much sweeter than processed honey and contains both fructose and sucrose, plus it still has its enzymes intact. although when heated some are destroyed.
i also used hazelnuts instead of walnuts....i just prefer a hazelnut in a brownie. the baking notes also suggested keeping these brownies in the refrigerator and to do so for several hours before slicing. i couldn't wait several hours so i stuck my in the freezer for about 30mins. i also substituted cocoa for coffee 1:1.
for kids and anytime these brownies are perfect but i did find for a brownie recipe the chocolate amount was quite modest... i would probably up this amount the next time i make these to 150 gms.
i soaked my beans overnight and cooked them in a large saucepan for 1.5hrs till i could smoosh them in between my fingers.

110gms unsweetened chocolate
1 cup unsalted butter
2 cups soft-cooked black beans, drained well (hs: canned is fine)
1 cup walnuts, chopped *hazelnuts
1 tablespoon vanilla extract
¼ cup (granulated) natural coffee substitute (or instant coffee, for gluten-sensitive) *cocoa
¼ teaspoon sea salt
4 large eggs
1½ cups light agave nectar *raw honey

Preheat the oven to 325°F. Line an 11- by 18-inch (rimmed) baking pan (hs note: or jellyroll pan) with parchment paper and lightly oil.

Melt the chocolate and butter in a glass bowl over simmering water. Stir with a spoon to melt the chocolate completely. Place the beans, 1/2 cup of the nuts, the vanilla extract, and a couple of spoonfuls of the melted chocolate mixture into the bowl of a food processor. Blend about 2 minutes, [i at least did 5 mins] or until smooth. The batter should be thick and the beans smooth. Set aside.

In a large bowl, mix together the remaining 1/2 cup nuts, remaining melted chocolate mixture, coffee [cocoa], and salt. Mix well and set aside. [next time i will omit the nuts and dot them into mixture when its in the baking pan]

In a separate bowl, with an electric mixer beat the eggs until light and creamy, about 1 minute. Add the agave nectar and beat well [approx. 7 mins till doubled in size and light and fluffly]. Set aside.

Add the bean/nut mixture to the coffee [cocoa]/chocolate mixture. Stir until blended well.

Add the egg mixture, reserving about 1/2 cup. Mix well. Pour the batter into the prepared pan. Using an electric mixer, beat the remaining 1/2 cup egg mixture until light and fluffy. Drizzle over the brownie batter. Use a wooden toothpick to pull the egg mixture through the batter, creating a marbled effect. Bake for 30 to 40 minutes, until the brownies are set. Let cool in the pan completely before cutting into squares. (They will be soft until refrigerated.)

Makes 45 (2-inch) brownies.

photos will be posted soon.

Thursday, October 9, 2008

i'm back with a classic


sorry i haven't posted for a while. haven't been cooking or baking that much...except for a bazillion cupcakes for the r.s.p.c.a -i managed to raise just under $200! so i'm pleased and thankful for all of you who bought some of my cakes to support the cause. big ups to you!!

so with my slackness i have decided to give away my infamous tofu burger recipe...
for someone who does not really care for burgers, it maybe that they are a relative of the sandwich family -rach can vouch for my weird fussy childish phobia against sandwiches [i shudder as i write the word...eeeewww.] if they're toasted, fine but a fresh salad sandwich, i'm cringing right now at the thought of ever being forced to eat such a thing....aaaarrrggghhh!!!
but i am proud to say that this phobia saved me from ever trying a macdonalds hamburger...yep never eaten one in my life...and that i am thankful for.

so i have always made the good old stax's tofu burgers for group t.v nights and whenever i ask adam what he feels like for dinner 9 times outta 10 he'll say tofu burgers.
now the trick to a good burger is the assembly...so you must get everything prepped and ready to go and also stick to the order..this is the key!!!


stax's tofu burgers
seves 4

500gms organic firm tofu [cut into 4 slices]
1 brown onion, sliced in half moons
large handful of mushrooms, sliced
2 - 3 medium sized tomatoes, sliced
large handful of baby spinach or rocket
3 dessert spoons crunchy peanut butter
1/4 cup rice,soy or coconut milk
soy sauce
kecap manis
mirin or rice wine vinegar
sweet chili sauce
sesame oil
oil - peanut, vegetable.
4 slices of swiss, or tasty cheddar cheese
sour cream
four crusty bread rolls, halved
chips to serve [preferably homemade]

pre-heat oven 150 deg C or spark up the bbq


step one:
place the slices of tofu into a zip lock bag or shallow container and drizzle approx. 2-3 tspns of soy sauce, 1-2 teaspoons of mirin or rice wine vinegar and a few drops of sesame oil. zip or cover your container and leave to marinade. you can do this from 10mins or up to two hours prior.

step two:
get the sauce ready. in a small saucepan place peanut butter, milk, and a teaspoon of each - kecap manis and sweet chili. and set aside

step three:
if you have a frying pan or skillet that is large enough to hold the four tofu slices, onions and mushies you can cook it all in the one pan otherwise use two or use the bbq!

on med heat, heat 1- 2 tablespoons of oil in a skillet, frying pan or season bbq. add your onion slices, stirring them often cook till soft and starting to brown in spots. add your mushrooms.

step four:
while the mushroom and onion mixture is cooking, push to the side of your pan take your tofu slices and add to the pan [if using separate pans heat 1-2 tspns oil then add tofu]. drizzle half of the marinade over the slices and cook for 5mins or until it is brown and crusty -but not dry! turn over and use rest of marinade and cook for 3-5mins. by this stage your mushroom onion mixture shoud be browned, give it a splash of soy if in a separate pan to tofu.

step five:
when you flip your tofu place your buns in the oven! to make them crusty and warm [approx 3mins]

step six:
everything should be cooked or just about so start you sauce.
you can turn everything off and keep warm in oven, covering with foil so they doesn't dry out or if you can juggle the timing go for it!! the sauce could be done at the beginning but i find it just doesn't taste as good.

heat small saucepan of sauce ingredients on med to low heat and stir to combine, when the peanut butter starts to become runny turn the heat to low and stir till desired consistency. you want it thick not runny but not like glue.

step seven:
the assembly!

take you crusty bun bottom [hee hee] and place on warmed plate.
smear sour cream on the base, and a small drizzle of sweet chili sauce.
lay some spinach down, a few slices of tomato and top with slice of cheese.
next the tofu, onion and mushroom and a generous dollop of satay sauce.
bun on top.
chips on side...
yummmmmmo!!!!!!


you won't make it any other way...and you'll get better at the juggling and timing of all things that you'll be making your own fries to go on the side!!!

Sunday, August 17, 2008

My Nan's peanut brownies


I am running the risk of being disowned by posting this recipe. These biccies are a complete family favourite, something you can always count on being great and plentiful when having cups of tea with my grandparents. Actually I only got the recipe from my Nanny when leaving the country, I begged her for it, claiming proper withdrawals from them being o/s. The name may be a misleading, they are not brownies in the tradional sense, you know like a gooey kind of slice. They are choccie peanut biscuits with a lovely crunch, and the best bit.......they are super easy and quick to whip up.

Preheat oven to 180C
125g melted butter
1 cup sugar
1 egg
Stir until fluffy
1.5 cups of SR flour
1 tbs cocoa
1 cup salted peanuts (if you are using unsalted peanuts you will need to add a tsp of salt)
Slowly stir in flour and cocoa, then add peanuts last
Use a teaspoon to measure out dough, form into little balls and space well on baking tray. Bake for 15-20 mins.

See it is so easy, so few ingredients needed for such a good cuppa tea treat.

Monday, July 28, 2008

baking for BeBe


i have become a member of the daring bakers. each month you are given a recipe to bake and the thousand or so members of this very daring group put on their aprons and get a mixing. the recipes chosen are usually a challenge and are chosen by a member of the group..something you have always wanted to bake.
so i'll be posting my daring results here on our blog. i had the perfect excuse to bake this monstrosity of a cake..BeBe's naming day. Sure ashley was going to be making a gorgeous li'l ladybug straight outta the women's weekly birthday cake cookbook -the bible of birthday cakes for kids. but the parentals need something a little more than butter cake and red icing!
sargon flew down for the event -he is BeBe's godfather and also my baking bitch. i had prepped the whole cake so all i had to do was asemble it the night before. ...it was mega!..but i'd probably do it again for a similar event although i kinda found it a bit 80's.
i also made these guys..
and some lady lamingtons...

cake split in three layers with prailine butercream and whipped cream filling.

sargon "martha stewart"joseph making the ganache

the result


so here is the recipe, bring a packed lunch to read it..as it goes for days..!!

Filbert Gateau with Praline Buttercream
From Great Cakes by Carol Walter

1 Filbert Genoise
1 recipe sugar syrup, flavored with dark rum
1 recipe Praline Buttercream
½ cup heavy cream, whipped to soft peaks
1 recipe Apricot Glaze
1 recipe Ganache Glaze, prepared just before using
3 tablespoons filberts, toasted and coarsely chopped

Filbert Genoise

Because of the amount of nuts in the recipe, this preparation is different from a classic genoise.

1 ½ cups hazelnuts, toasted/skinned
2/3 cup cake flour, unsifted
2 Tbsp. cornstarch
7 large egg yolks
1 cup sugar, divided ¼ & ¾ cups
1 tsp. vanilla extract
½ tsp. grated lemon rind
5 lg. egg whites
¼ cup warm, clarified butter (100 – 110 degrees)

Position rack in the lower 3rd of the oven and preheat to 350 degrees. Grease and flour a 10” X 2” inch round cake pan.

Using a food processor, process nuts, cake flour, and cornstarch for about 30 seconds. Then, pulse the mixture about 10 times to get a fine, powdery mixture. You’ll know the nuts are ready when they begin to gather together around the sides of the bowl. While you want to make sure there aren’t any large pieces, don’t over-process. Set aside.

Put the yolks in the bowl of an electric mixer, with the whisk attachment, and beat until thick and light in color, about 3-4 minutes on med-high speed. Slowly, add ¾ cup of sugar. It is best to do so by adding a tablespoon at a time, taking about 3 minutes for this step. When finished, the mixture should be ribbony. Blend in the vanilla and grated lemon rind. Remove and set aside.

Place egg whites in a large, clean bowl of the electric mixer with the whisk attachment and beat on medium speed, until soft peaks. Increase to med-high speed and slowly add the remaining ¼ cup of sugar, over 15-20 seconds or so. Continue to beat for another ½ minute.
Add the yolk mixture to the whites and whisk for 1 minute.

Pour the warm butter in a liquid measure cup (or a spouted container). * It must be a deep bottom bowl and work must be fast.* Put the nut meal in a mesh strainer (or use your hand – working quickly) and sprinkle it in about 2 tablespoons at a time – folding it carefully for about 40 folds. Be sure to exclude any large chunks/pieces of nuts. Again, work quickly and carefully as to not deflate the mixture. When all but about 2 Tbsp. of nut meal remain, quickly and steadily pour the warm butter over the batter. Then, with the remaining nut meal, fold the batter to incorporate, about 13 or so folds.

With a rubber spatula, transfer the batter into the prepared pan, smoothing the surface with the spatula or back of a spoon. **If collected butter remains at the bottom of the bowl, do not add it to the batter! It will impede the cake rising while baking.

Tap the pan on the counter to remove air bubbles and bake in the preheated oven for 30-35 minutes. You’ll know the cake is done when it is springy to the touch and it separates itself from the side of the pan. Remove from oven and allow to stand for 5 minutes. Invert onto a cake rack sprayed with nonstick coating, removing the pan. Cool the cake completely.

*If not using the cake right away, wrap thoroughly in plastic wrap, then in a plastic bag, then in the refrigerator for up to 3 days. If freezing, wrap in foil, then the bag and use within 2-3 months.

Sugar Syrup
Makes 1 cup, good for one 10-inch cake – split into 3 layers

1 cup water
¼ cup sugar
2 Tbsp. dark rum or orange flavored liqueur

In a small, yet heavy saucepan, bring the water and sugar to a boil and simmer for 5 minutes. Remove from heat, add the liqueur. Cool slightly before using on the cake. *Can be made in advance.

Praline Buttercream
1 recipe Swiss Buttercream
1/3 cup praline paste
1 ½ - 2 Tbsp. Jamaican rum (optional)

Blend ½ cup buttercream into the paste, then add to the remaining buttercream. Whip briefly on med-low speed to combine. Blend in rum.

Swiss Buttercream
4 lg. egg whites
¾ cup sugar
1 ½ cups (3 sticks) unsalted butter, slightly firm
1 ½ -2 Tbsp. Grand Marnier or liqueur of your choice
1 tsp. vanilla

Place the egg whites in a lg/ bowl of a elevtric mixer and beat with the whisk attachment until the whites are foamy and they begin to thicken (just before the soft peak stage). Set the bowl over a saucepan filled with about 2 inches of simmering water, making sure the bowl is not touching the water. Then, whisk in the sugar by adding 1-2 tablespoon of sugar at a time over a minutes time. Continue beating 2-3 minutes or until the whites are warm (about 120 degrees) and the sugar is dissolved. The mixture should look thick and like whipped marshmallows.
Remove from pan and with either the paddle or whisk attachment, beat the egg whites and sugar on med-high until its a thick, cool meringue – about 5-7 minutes. *Do not overbeat*. Set aside.

Place the butter in a separate clean mixing bowl and, using the paddle attachment, cream the butter at medium speed for 40-60 seconds, or until smooth and creamy. *Do not overbeat or the butter will become toooooo soft.*

On med-low speed, blend the meringue into the butter, about 1-2 Tbsp. at a time, over 1 minute. Add the liqueur and vanilla and mix for 30-45 seconds longer, until thick and creamy.

Refrigerate 10-15 minutes before using.

Wait! My buttercream won’t come together! Reheat the buttercream briefly over simmering water for about 5 seconds, stirring with a wooden spoon. Be careful and do not overbeat. The mixture will look broken with some liquid at the bottom of the bowl. Return the bowl to the mixer and whip on medium speed just until the cream comes back together.

Wait! My buttercream is too soft! Chill the buttercream in the refrigerator for about 10 minutes and rewhip. If that doesn’t work, cream an additional 2-4 Tbsp. of butter in a small bowl– making sure the butter is not as soft as the original amount, so make sure is cool and smooth. On low speed, quickly add the creamed butter to the buttercream, 1 Tbsp. at a time.

Refrigerate in an airtight container for up to 5 days, or can be frozen for up to 6 months. If freezing, store in 2 16-oz. plastic containers and thaw in the refrigerator overnight or at room temperature for several hours.

Praline Paste
1 cup (4 ½ oz.) Hazelnuts, toasted/skinless
2/3 cup Sugar
Line a jelly roll pan with parchment and lightly butter.

Put the sugar in a heavy 10-inch skillet. Heat on low flame for about 10-20 min until the sugar melts around the edges. Do not stir the sugar. Swirl the pan if necessary to prevent the melted sugar from burning. Brush the sides of the pan with water to remove sugar crystals. If the sugar in the center does not melt, stir briefly. When the sugar is completely melted and caramel in color, remove from heat. Stir in the nuts with a wooden spoon and separate the clusters. Return to low heat and stir to coat the nuts on all sides. Cook until the mixture starts to bubble. **Remember – extremely hot mixture.** Then onto the parchment lined sheet and spread as evenly as possible. As it cools, it will harden into brittle. Break the candied nuts into pieces and place them in the food processor. Pulse into a medium-fine crunch or process until the brittle turns into a powder. To make paste, process for several minutes. Store in an airtight container and store in a cook dry place. Do not refrigerate.

Apricot Glaze
Good for one 10-inch cake

2/3 cup thick apricot preserves
1 Tbsp. water

In a small, yet heavy saucepan, bring the water and preserves to a slow boil and simmer for 2-3 minutes. If the mixture begins to stick to the bottom of the saucepan, add water as needed.

Remove from heat and, using a strainer, press the mixture through the mesh and discard any remnants. With a pastry brush, apply the glaze onto the cake while the cake is still warm. If the glaze is too thick, thin to a preferred consistency with drops of water.

Ganache Glaze
Makes about 1 cup, enough to cover the top and sides of a 9 or 10 inch layer or tube cake

**Ganache can take on many forms. While warm – great fudge sauce. While cool or lukewarm – semisweet glaze. Slightly chilled – can be whipped into a filling/frosting. Cold & solid – the base of candied chocolate truffles.

6 oz. (good) semisweet or bittersweet chocolate, like Lindt
6 oz. (¾ cup heavy cream
1 tbsp. light corn syrup
1 Tbsp. Grand Marnier, Cointreay, or dark Jamaican rum (optional)
¾ tsp. vanilla
½ - 1 tsp. hot water, if needed

Blend vanilla and liqueur/rum together and set aside.

Break the chocolate into 1-inch pieces and place in the basket of a food processor and pulse until finely chopped. Transfer into a medium sized bowl and set aside.

Heat the cream and corn syrup in a saucepan, on low, until it reached a gentle boil. Once to the gently boil, immediately and carefully pour over the chocolate. Leave it alone for one minute, then slowly stir and mix the chocolate and cream together until the chocolate is melted and incorporated into the cream. Carefully blend in vanilla mixture. If the surface seems oily, add ½ - 1 tsp hot water. The glaze will thicken, but should still be pourable. If it doesn’t thicken, refrigerate for about 5 minutes, but make sure it doesn’t get too cold!

Assembling Cake

Cut a cardboard disk slightly smaller than the cake. Divide the cake into 3 layers and place the first layer top-side down on the disk. Using a pastry brush, moisten the layer with 3-4 Tbsp. of warm sugar syrup. Measure out 1 cup of praline buttercream and set aside.

Spread the bottom layer with a ¼-inch thickness of the remaining buttercream. Cover with ½ of the whipped cream, leaving ¼-inch border around the edge of the cake. Place the middle layer over the first, brush with sugar syrup, spreading with buttercream. Cover with the remaining whipped cream.

Moisten the cut side of the third layer with additional sugar syrup and place cut side down on the cake. Gently, press the sides of the cake to align the layers. Refrigerate to chill for at least 30 minutes.

Lift the cake by sliding your palm under the cardboard. Holding a serrated or very sharp night with an 8-ich blade held parallel to the sides of the cake, trim the sides so that they are perfectly straight. Cut a slight bevel at the top to help the glaze drip over the edge. Brush the top and sides of the cake with warm apricot glaze, sealing the cut areas completely. Chill while you prepare the ganache.

Place a rack over a large shallow pan to catch the ganache drippings. Remove the gateau from the refrigerator and put it the rack. With a metal spatula in hand, and holding the saucepan about 10 inches above the cake, pour the ganache onto the cake’s center. Move the spatula over the top of the ganache about 4 times to get a smooth and mirror-like appearance. The ganache should cover the top and run down the sides of the cake. When the ganache has been poured and is coating the cake, lift one side of the rack and bang it once on the counter to help spread the ganache evenly and break any air bubbles. (Work fast before setting starts.) Patch any bare spots on the sides with a smaller spatula, but do not touch the top after the “bang”. Let the cake stand at least 15 minutes to set after glazing.

To garnish the cake, fit a 12 – 14-inch pastry bag with a #114 large leaf tip. Fill the bag with the reserved praline cream. Stating ½ inch from the outer edge of the cake, position the pastry tube at a 90 degree angle with the top almost touching the top of the cake. Apply pressure to the pastry bag, moving it slightly toward the center of the cake. As the buttercream flows on the cake, reverse the movement backward toward the edge of the cake and finish by pulling the bag again to the center. Stop applying pressure and press the bag downward, then quickly pull the tip up to break the flow of frosting. Repeat, making 12 leaves evenly spaced around the surface of the cake.

Make a second row of leaves on the top of the first row, moving the pastry bag about ¾ inch closer to the center. The leaves should overlap. Make a 3rd row, moving closer and closer to the center. Add a 4th row if you have the room. But, leave a 2-inch space in the center for a chopped filbert garnish. Refrigerate uncovered for 3-4 hours to allow the cake to set. Remove the cake from the refrigerator at least 3 hours before serving.

Leftover cake can be covered with foil and kept in the refrigerator for up to 5 days.

Wednesday, July 23, 2008

Suppli al telefono (Rice Balls)


I cannot remember when I first made these and whether or not it was because I had left over risotto or whether I was craving the delicious rice balls that I used to get from Iku wholefoods in Glebe. Anyway, they have been part of the repetoire for a while, getting various incarnations from main meal to drinks nibbly.

This time I decided to do some research before hand and found out that there are many kinds of rice ball. Arancini - which are fried or, less commonly, baked rice balls, having a diameter of 8-10 cm, filled usually with ragù (meat sauce), but also with tomato sauce, mozzarella, peas, and other things. On the outside they are simply breadcrumbs; and Suppli - which can be seen as a larger version of arancini, but with tomato sauce, or as a kind of croquette.
I thought I would try out a more authentic recipe for my recent rice ball craving. This one (from foodnetwork.com) worked out tasting very yummy indeed - making an excellent pre poker dinner and post poker eve snack the next day!


Ingregients

3/4 cup dried porcini mushrooms

2 tablespoons tomato paste

2 cups beef stock

1 450g can peeled Italian tomatoes and their juices, crushed by hand

3 tablespoons plus 1 tablespoon butter

1 2/3 cups Vialone, Avorio or Arborio rice

2 eggs

2/3 cup freshly grated Parmigiano-Reggiano

1 onion, chopped

50g prosciutto, finely chopped

200g ground beef

Salt and freshly ground black pepper, to taste

150g mozzarella, cut into 1/4-inch dice

3/4 cup unseasoned bread crumbs

1 litre extra virgin olive oil - or other- for frying

Method

Soak the mushrooms in 1/2 cup water for 2 hours. Drain the mushrooms, reserving the mushroom water, and chop finely. Dissolve the tomato paste in the mushroom water and set aside.


Meanwhile, in a medium saucepan, combine the beef stock, crushed tomatoes and 3 tablespoons butter, mix well and bring to a boil. Add the rice, reduce the heat to a simmer and cook until the rice is done, stirring throughout. Turn the rice mixture out into a serving bowl and gradually stir in the eggs and Parmigiano. Set aside to cool.

Meanwhile, in a frypan, melt the remaining tablespoon of butter over low heat. Add the onion and prosciutto and cook over high heat 3 minutes. Add the ground beef and cook until well browned. Add the mushrooms, mushroom water-tomato paste mixture, and salt and pepper to taste, and keep at a simmer.

Make egg-shaped portions of the rice, and make an indentation in the center of each one. Place a teaspoon of filling in the center of each ball of rice, along with a few cubes of the cheese. Add some more rice to cover this and roll into a ball Roll each ball in the bread crumbs so that it is completely coated.

In a large, heavy bottomed pot, heat the olive oil over high heat until it is almost smoking. In batches, fry the balls in the hot oil until they are golden brown, about 5 minutes. Remove with a slotted spoon and allow to drain on paper towels while seasoning with salt and pepper. Serve with a nice homemade tomato sauce.

Sunday, June 29, 2008

Very Berry Baking

There seems to be a bit of a baking thing going on with this blog at the moment, which has inspired me to keep it going. Those cupcakes from Stakaz have had my mind wandering and mouth watering for over a month now....

I have mentioned in an earlier post the absolutely divine berries you can get in
Scando during the summer. Well it is that time of the year, and we have been munching on strawberries that taste as sweet and luscious as any you can even imagine. I have also talked about 'fika' and the very best fikas are those where a bit of 'jordgubbkaka' (strawberry cake), is available and fresh. The first cake here is an attempt on the classic, the recipe given to me by my Swedish boss. Apparently this is a basic swedish kaka recipe and the strawberries can be substituted for any other berries fresh or frozen, and apple and pear as well.
(also sorry about the mls/gms mix up with this recipe, in sweden they use decilitres for all baking measurements so thought I would just stick to the very literal conversion with all ingredients)

Swedish Strawberry Cake


Ingredients
1 egg
150 mls sugar
125g butter (melted)
150ml flour
150-200 g strawberries

* Preheat oven at 200°C and grease form cake pan
* beat sugar and egg for 2 mins
* add melted butter and mix
* add flour and mix
* put batter in tin and drop berries over the top (they will sink a little)
* Bake for about 25 mins.

It is quite a thin little cake, but simple and sweet.

I am a bit of a cheesecake fan, but would you believe I have never in my life attempted to make one myself. This is the first. But these local strawberries were just begging to be used in combo with a tangy cheesy sweet delicacy.
The recipe used here is from http://www.momswhothink.com and chosen because of the fewest fiddly ingredients.

Strawberry Cheesecake


Ingredients:

1 cup digestive biccie crumbs
3 Tbsp. butter, melted
3 Tbsp. sugar
2 pkg. (200g. each) cream cheese, softened
1/2 cup sugar
1 Tbsp. lemon juice
1 tsp. grated lemon peel
1 cup sour cream
3 eggs
1 Tbsp. cornflour
About 300g fresh strawberries, (I'm not sure we had this amount left by the time they got to the topping, they were too good for little boys to resist sitting washed on the bench)


Directions:
* Preheat oven to 170°C
* Mix biccie crumbs, butter and sugar. Press firmly into bottom of pan.
* Bake 10 minutes, remove from oven and set aside.
* Raise oven temperature to 180°C.
* Beat 1/2 cup sugar, cream cheese, lemon juice and lemon peel with electric mixer on medium speed until well blended.
* Add sour cream; mix well. Add eggs, 1 at a time, mixing on low speed after each egg is added just until blended. Pour into crust.
* Bake 50 minutes or until center is almost set. Cool.
* Wash then drain strawberries, reserving liquid. In a medium saucepan add enough water to reserved liquid to measure 1/2 cup then mix in cornflour, blending well.
*Bring to boil on medium heat, stirring constantly. Boil 1 minute. Cool, then stir in the strawberries and spread evenly over cooled cheesecake. Refrigerate at least 4 hours before serving.

Wednesday, June 11, 2008

boozy birthday baking....


i was on the hunt for a marshmallow frosting that didn't turn to rock once it set..and this one's a winner! and so is this blog..if you're into cupcakes, then you'll love drooling over the recipes. http://howtoeatacupcake.blogspot.com/2008/03/white-velvet-cupcakes-with-marshmallow.html
i used the marshmallow frosting recipe and tweaked the base recipe adding champagne.
i made these for sjaida's birthday. 29 cupcakes for a 29yr old b'day gal....

i also made these babies.... yuuuummmmmmmmmmmmmmmm
http://howtoeatacupcake.blogspot.com/2008/02/chocolate-frangelico-cupcakes-w-nutella.html


Champagne cupcakes w/ marshmallow frosting
approx. 18 cupcakes

2 cups all-purpose flour
2 teaspoons baking power
1 teaspoon salt, plus a pinch for the egg whites
½ cup unsalted butter, room temperature
1 ¼ cups sugar
2/3 cup champagne
3 egg whites

1. Preheat oven to 180°C.
2. Mix flour, baking powder, and salt together and set aside.
3. Cream butter and sugar until light and fluffy. Alternately add flour mixture and milk, ending with milk, and beat until batter is smooth. Add flavoring.
4. Beat egg whites with a pinch of salt until stiff but not dry. Gently fold into batter. Fold in mini-marshmallows.
5. Spoon batter into cupcake papers, filling cups about 2/3 full. Bake for 20-25 minutes or until tester inserted into the center comes out clean. Remove from oven and cool.


Marshmallow Frosting
i found that i had just over a cup's worth of frosting left after generously frosting the cakes... so i ate it! you could halve these measurements and still have plenty.

2 large egg whites
1 cup sugar
6 tbsp water
1 tbsp golden syrup [can use glucose or light corn syrup]
½ tsp cream of tartar
Pinch of salt
1 cup miniature marshmallows
1 tsp vanilla extract
flaked or shredded coconut for decoration

In a large, clean heatproof bowl, combine the egg whites, sugar, water, corn syrup, cream of tartar, and salt. Set the bowl over (but not touching) simmering water in a saucepan and heat the mixture, whisking constantly, until the sugar has dissolved and the mixture is very warm to the touch (about 160°F on an instant-read thermometer), about 3 minutes. Remove the bowl from the saucepan. Using an electric mixer on medium-high speed, beat the mixture until it is very warm and soft (but not dry) peaks form, about 2 minutes. Reduce the mixer to low and add the marshmallows and vanilla. Continue beating until the marshmallows are melted and the frosting is completely smooth, about 2 minutes more. Use right away.

sprinkle with coconut

and eat!!!

Sunday, June 1, 2008

I scream for ice cream

Our Swedish friends came over for dinner a while back and brought with them some yummy homemade ice cream.


We tried it to make it once before but it was not quite the same as their delicious offering. So we wanted to try something a little different, they made theirs with Sweden's favourite 'Daim' chocolate bars as the main flavour, but we decided to try it with toblerone as that is much easier for folk to get. Getting daim in Oz means a trip to IKEA (which if you are in Sydney means quite a trek to the burbs). We also made two batches at the same time just altering one ingredient. John was not too happy with the scientific procedure I used...ok there was more than one variable as I didn't have any vanilla when I started.

Yellow toblerone ice cream
4 egg yolks
100 mls of castor sugar
400 mls of thick cream
2 tbs of syrup (golden, maple or honey would be fine)
1 tbs vanilla essence
100g block of toblerone chopped finely
Whisk egg yolk and sugar until fluffy
Add cream and whisk
Stir through syrup, vanilla and toblerone
Place in freezer for at least four hours, stirring occasionally so all the choccie bits don't just sit on the bottom of the bowl

White toblerone ice cream
We thought there might be some translation problem with the yolk part of the recipe, and didn't have another use for the egg whites so we just replaced the yolks of the egg for the egg whites and used the same method.


Not suprisingly there is a bit of difference in the taste. The yellow ice-cream tastes more like an italian style creamy gelato, quite rich in flavour and may be nice with some more bitter choccie stirred through. The white ice-cream was lighter
and as we are experiencing our first flutter of summer here in scando went down a treat.

Sunday, May 25, 2008

Baked Eggs

Going out for a lazy breakfast on the weekend is one of the things I miss most living in Asia. You cannot really laze about over a noodle soup or bowl of rice congee - although it has been tried, the atmosphere in the street side food stall is not really right. A lazy breakfast needs reading materials, comfortable chairs, good food and coffee (or tea if you are me). In Melbourne my favorite breakfast is at Ray’s café in Brunswick, where despite not even having an oven they managed to make the most superb baked eggs using a salamander grill. There were two options one veggie and one meaty with chorizo (which is my second most missed food item here after salt and vinegar chips) and they were both delicious.

This recipe is for baked eggs is super simple and can be adapted and changed to suit everyone. Apologies for no picture but my camera has died.

Ingedients (Per person)

2 free range eggs
3 slices of smoked ham (or any other yummy pork product. For veggie option I would use sliced portabello mushrooms)
6 cubes fetta (or goats cheese, haloumi, stilton)
3 slices of tomato
4 spinach leaves
3 basil leaves
1.5 tbsp of red pesto (or green pesto or olive tapenade or tomato relish etc)

Heat oven to 180°C. In an oven proof bowl (I have been meaning to buy nice ramekin things but just use normal bowls at the moment) spread half the red pesto. Layer ham, then tomato, spinach, torn basil leaves and crumble over half the fetta. Break eggs into bowl. Crumble over remaining fetta and red pesto. Season with salt and pepper. Cook for 20 minutes in medium oven. The eggs should still look slightly uncooked. This is ok as they will continue to cook a little once out (and they are yummy when you mix them up and they are still a bit runny). Serve with slices of Turkish bread or baguette for dipping.

Monday, May 5, 2008

Corn Soup


Whenever I miss Melly, I make this soup.  Throughout the many years of dining together, we ate this regularly.  It's a Stephanie Alexander recipe that usually includes crab meat which strangely, and for no particular reason, I have never included.  Over the years, I've adjusted Stephanie's ingredient measurements, basically adding more of everything. This recipe makes around 2-3 bowls.  We (Luke and me) like it really thick but you could always add a little more stock which would stretch it out a little.

 
Ingredients:
6 x corn cobbs grated 
4 x spring onions finely chopped
2 x tbsp grated ginger
600mls vegie stock
2 x tbsp light soy sauce
2 x tbsp mirin
1 x tbsp corn flour
2 x tbsp water
2 x tsp sesame oil
big pinch of salt
2 x eggs
2 x tsp vegetable oil


How to make:
Grate the corn from the cobs.  A messy experience but the luscious colour of yellow will make it all better.  


Grate the ginger, and finely chop the spring onion.

In a large pot, fry up spring onion and ginger in a little oil.  

Pour in 600ml of vegie stock then add the corn, soy and mirin.  Bring to boil, then simmer for 2-3 minutes.

Mix the cornflour, water and sesame oil together in a cup then add to the soup.

Beat the eggs with salt and vegie oil (in the same used cup) then trail into the soup. Then stir, stir, stir.

Adjust to your taste adding either soy or mirin.
Garnish with a little chopped spring onion and a dash of soy and there you have it - a delicious, sweet, corn soup.  So, whenever you need a Melly fix, make this soup, crack a beer and reminisce of the good 'ol days, like I do...

Saturday, May 3, 2008

A Family Affair

I call this an old family recipe because it has such a personal history and so many stories that surround it, such as: when it almost blinded my Burmese-Italian cousin: “Darshan, I’m blind….IM BLIND!!”, or when it almost helped my sister lose her first boyfriend [we hoped], or when my dad [Pa], true master of the recipe, woke up the morning after the very same sister’s wedding to find a trail of rose petals leading from his bedroom directly to the szechuan chicken recipe [hint hint!].

But as experts in Chinese geography might have guessed, and as you can see from the scan below, the recipe is not Sri Lankan. Its ripped from Charmaine Solomon’s Asian Cookbook [a must have] and I still follow her pretty much to the letter. It may look slack [and sorry about the sm. type] but I’ve included a scanned version of our original family copy below to show the amount of use it has had over the years [notice the ‘tick’ up the top which must have been the first time Pa chose to cook it].


A word in favour of deep-frying: This is not a cooking technique to be derided or looked down on but a fine art of precision, texture and fish & chip shop sound effects. A few of the other contributors to Family Pies are responsible for purchasing my deep-fryer and well, its been a hot, crispy, slightly salty, 3rd degree burning love affair ever since. In short: don’t try shallow frying this chicken – Pa and Charmaine just won’t have it.

WARNING: Szechuan chicken is extremely tasty before you put it in the sauce [kinda like KFC] and will be snapped up by any kitchen hangers in the vicinity. It is also one of those slow-melding, burning dishes that pack extra punch and flavour on day two: often devoured with toast or in a Brewell in front of the Sega Mega Drive. So make extra – perhaps triple the current recipe?

Friday, May 2, 2008

doin it for the kids

along with my naturopath encouraging me to change my diet. so is my g.p.... i am on a kind of vegan/candida diet..doesn't that sound awesome!!!
so i'm becoming a bit of a hippy health freak.
and this is what i eat for breakfast..... enjoy!!!!

quinoa porridge with bananas, strawberries, cinnamon and warm honey

quinoa [pronounced KEEN-wah] is a fantastic grain. high in protein, lysine, magnesium, iron and is gluten free. so this little bowl of porridge packs a punch! you can cook it the same way you do for rice but you must rinse the grain well.

this makes 1 serve so double the quantity for two and so on. this combo is my fav but if in season blueberries are gold! you can use honey instead of maple syrup. oh and please cook it on the stove as to a microwave...it tastes a whole lot better!

1/2 cup quinoa* [or replaced with organic rolled oats]
1/2 cup water
1/2 milk rice, cow or soy
1/2 banana, sliced
few strawberries, sliced
maple syrup to drizzle
ground cinnamon
extra milk to serve

*quinoa needs to be rinsed well or alternatively you can soak for a couple of hours or even overnight then rinse and drain.

put grains, water and milk into a small saucepan and cook over medium heat.
bring the mixture to the boil, cover and reduce heat to a slow simmer for about 10-15 mins
if using oats do not cover just stir constantly, cook for 5-10 minutes until the oats are tender.

place in a deep bowl top with fruit. drizzle with syrup and a sprinkle of cinnamon. i like it with an extra splash of milk so i can eat it straight away without burning my mouth!

variation: stewed apples and cinnamon - place diced apple into a saucepan when starting the porridge. with 2 tablespoons of water, a drizzle of either honey or maple sryup and a sprinkle of cinnamon. cover and cook on gentle heat for about 5-10 mins until apple is soft.


muesli bars

for the quick breakfast start and an extremely good snack for the li'l ones is my own homemade muesli made into a bar. good for those mornings you don't even have time to make yourself a cuppa... so just grab one of these and go!

1 cup rolled oats
1/2 cup bran
1/2 cup LSA*
1/2 cup pumpkin seeds
1/2 cup sunflower seeds
1/2 cup sesame seeds
2 cups dried fruit roughly chopped. i used figs, dates and barberries
1/2 cup shredded coconut
2/3 cup of honey or rice syrup
1/3 cup natural peanut butter
1 tablespoon olive oil

pre heat oven at 175 deg C and lightly grease an 11" x 7" tray
mix all dry ingredients into a large bowl
put honey, peanut butter and oil into a small saucepan and stir to combine over low heat.
once at a runny consistency pour over dry ingredients and mix well.
the mixture should be a sticky mess.
press mixture into tray and smooth out evenly with the back of a spoon.

place in oven and cook for 10-15 mins till golden brown

allow to cool then cut into bars, wrap individually with baking paper and keep in fridge if hot weather.

*LSA is Linseed (Flaxseed), Sunflower and Almond mix, is used to provide essential fatty acids, soluble fibre and other nutrients. LSA is prepared by grinding up 3 parts Linseed, 2 parts Sunflower seed and one part Almond.

Thursday, May 1, 2008

Lamb pita pockets

This is one of John's specialties but I never complain when he wants to make it as I am a bit of a lamb fan and this is one of the best ways to have it. It is not always possible to get lamb and this recipe works well with beef mince too, but the lamb mint combo is so heavenly that it really is worth seeking out lamb. You also need to have lots of good mint for this recipe too.


Lambballs
300-400g of lamb mince
1 egg
1 small spanish onion finely chopped (if we have a large red onion we will use half here and half in the salad)
1 cup finely chopped fresh parsley
1 cup chopped fresh mint
Mix everything together and shape into golf ball size meatballs with wet hands. Cook in pan or on barby.


Mint Salad
3 large tomatoes sliced
1 small spanish onion finely sliced
a handful of fresh mint leaves
juice of one lemon
slurp of good olive oil

Serve on halved pita pockets and top with natural yoghurt. Delish.....

Wednesday, April 30, 2008

soup season


its winter here and i am so pleased, as it means soup season! 


i have re-discovered adzuki beans. they are usually used in cakes and sweets as a red bean paste in asian cooking but they are also great in savoury dishes.... especially for vegos as they contain 25% protein.
my naturopath has put me on a high protien diet - i have sadly said good bye to my high in refined carbohydrates diet. oh how i miss my weekly pasta night and pizza has now become a guilty pleasure.
i used to be proud about eating carbs as every mo fo is on a protien diet -the NW / jennifer aniston loose a million kilos, carbs are evil blah blah blah. 
but i am not on that type of diet.....oooh no! it's to make me big and strong not a nicole ritchie lollypop head!

shannon gave me a wonderful cookbook for my birthday wholefood for the family by jude blereu. she has some amazing recipes, especially soups!

i roasted the garlic with the pumpkin instead of adding it to the pan along with the onion. i used approx 4-5 cloves as roasting the garlic takes away its pungent flavour and gives it a creamy taste. it takes about half of the pumpkin's roasting time. their skins will be brown and crispy and inside will be soft. remove the skin and husk and mash to a paste. add it to the soup with the pumpkin.
otherwise use 3 cloves to saute in pan.

spiced pumpkin and adzuki bean soup

220gms adzuki beans, soaked over night in plenty of water
1.3 kg pumpkin, butternut squash, kent or jap
2 tablespoon olive oil
1 brown onion
4-5 garlic gloves, whole with skins left on
1 tablespoon finely grated ginger
pinch of nutmeg
1 teaspoon ground cumin
1 teaspoonn ground coriander
a handful of fresh coriander, roughly chopped
1.75 litres vegetable stock
2 teaspoon of tamari or light soy sauce
natural yogurt to serve [optional]

pre heat oven to 200 deg C
for butternut pumpkin, cut in half and scoop out the seeds.
for the kent and jap fans cut into very large sections and remove seeds.
rub with 1 tablespoon of the oil
place on a baking tray and bake for 40-60 minutes or until soft.
remove from oven and set aside
or start the soup when your pumpkin is just about cooked.

put remaining olive oil into a large saucepan [24 cm] 
add onion [ 3 cloves of chopped garlic -if you have not roasted] and ginger and saute over a low heat for approximately 5 minutes till onion is soft and lightly coloured.
add the nutmeg and ground spices plus half of the coriander, stir through for 1 minute.

scoop the flesh from the pumpkin plus the roasted garlic paste and add to the pan
add to the pot the drained beans
pour in stock, partly cover and simmer gently for 1 hour.

check that the beans are tender by squishing one onto a bread board. the bean should easily smoosh.
if cooked you can blend the soup. if it is too thin cook over medium heat at a high simmer until you have your desired consistency. 
check for taste and add the tamari or soy if needed.

spoon into warmed bowls, top with a dollop of yogurt and a sprinkle of fresh coriander.


mmmm........

sorry pics will be added soon..i forgot and ate the soup !!

Friday, April 25, 2008

caramel craving

i must apologise for the no show in march.. my excuse..too many parties.
birthday parties that is. So i have decided to post adam's absolute favourite dessert -which i made for his birthday of course! Again it is based on stephanie alexander's
a cooks companion recipe.. this is the second time i have made this ..and it is pretty fool proof.

not only did i double the quantity which allowed me to have three servings of it...yum!!! i also doubled the infusion of oranges...in both syrup and custard. i remember eating the seville orange creme caramel at neil perry's rockpool and their orangey caramel sauce was soooo good i wanted to lick the plate..actually i think i did!?


orange infused creme caramel


serves 4

2 eggs
2 egg yolks
2 tablespoons castor sugar
350ml milk
zest of 1/2 orange

caramel
1 cup castor sugar
1/2 cup water
zest of 1/2 orange

500 ml ramekin / souffle dish

warm milk in a small saucepan and add zest 1hr prior.

pre heat oven 160 deg.

to make the caramel sauce dissolve sugar in water in a small saucepan over medium heat.
bring to boil DO NOT STIR brush sides of pan with a wet pastry brush too avoid crystals forming on the sides of pan.
add the zest and increase heat, boiling till till you have a deep golden carmel.

remove from heat and allow to rest till all bubbles have gone then pour into dish and CAREFULLY as the caramel is extremely hot! turn dish to coat sides evenly.

lightly whisk eggs, yolks and sugar together -no need for an electric mixer here.
then pour in milk.
strain [or if you're like me and couldn't be bothered -don't!] into caramel lined dish.

place into a large baking dish and pour in hot water to come halfway up sides.

bake for 45mins or until just set. remove from baking dish and place in the fridge overnight.

to serve, place a large plate over dish and invert... the caramel will pour over and down the sides of the custard and you'll not want to share any of it!

i wish it was still in the fridge!

enjoy!

Tuesday, April 1, 2008

In the cal-zone


After a busy months end (hmmmm too many holidays), I am cheating a little here and using some of an old post for ingredients and method. You may remember the very first entry for pizza,
and that the amount of dough is quite substantial. Well the great news is the dough freezes well and can be used for other tasty treats such as this calzone. You can also use some of the sauce in the filling too. Love a meal with pre-prepared yet homemade ingredients......

Dough
See method for pizza entry

Filling
This is the fun and creative part! This can be totally up to your taste, or even what you may have in the house! Here are just two of the standard combos we use in our place/

Veg- Mix spinach, fetta, parmesan, mushrooms, black olives and a splash of tommy sauce also on pizza page

Meaty- Any ham, prosciutto, (ground or thinly sliced)lamb or beef, mixed with spinach, cheeses, mushrooms, olives and of course the splash of tommy sauce

Putting it all together

* So you roll out your dough on a large floured surface.
* Then get a small(ish) dinner plate and cut out as many dough circles as you need.
* Once the rounds are made, you spoon about two tablespoons of the filling mixture into the middle of each round.
* Fold the rounds in half and pinch and fold round edges together.
* Brush top with egg or even just a little olive oil

* Place onto baking tray and put in 180- 200 degree oven for about 15-20 mins until each calzone in a lovely golden colour.
* When you take them out drizzle with a bit of yum e.v.o.o especially in the crease, and enjoy as a snack on its own or with a crispy rocket based salad for a main meal.
Enjoy

Monday, March 31, 2008

Laksa


While supermarket shopping in Thailand the other day I came across fried tofu puffs which I have never seen in Laos and immediately thought Laksa. Now, I have made many Laksa's over the years and while they are usually very tasty they are often really, really time consuming. I mean really, on most days, who could be bothered to boil prawn heads to get a stock - even if it is a damm tasty stock. So I took a risk and attempted a recipe from my new 'Bowl Food' cookbook purchased from the Cambodian chain bookstore that sells a wide range of photocopied, copyright infringed books. It looked easy and surprisingly was quite tasty. Anyway, that is why a make this post -it is a recipe for a tasty Laksa that you don't have to dedicate a day to.

For paste

1 ½ tablespoons coriander seeds
1 tablespoon cumin seeds
1 teaspoon ground turmeric
1 onion, chopped
1cm x 3cm piece of ginger, chopped
3 cloves garlic, chopped
3 stems lemongrass, sliced
4-6 small red chilies
2-3 teaspoons shrimp paste


For soup

1 L chicken stock
½ cup oil (I only used a few tablespoons)
3 cups coconut milk (I made do with a 200ml can coconut cream)
4 fresh kaffir lime leaves
2 ½ tablespoons fresh lime juice
2 table spoons fish sauce
2 tablespoons palm sugar or brown sugar
Handful of prawns or pork or beef or veggies
250g dried vermicelli noodles

To serve

1 cup bean sprouts
Handful of fried tofu puffs
4 hardboiled eggs
Mint, coriander – chopped
Lime wedges – to serve
Fried shallots – to serve

Dry roast the coriander seeds. Grind in a mortar and pestle. Repeat for cumin seeds. Put all of the ingredients for the paste in a blender and add half a cup of stock and blend to a paste.

Heat the oil and cook the paste on a low heat for 3- 5 minutes while stirring. Add remaining stock and bring to boil, then reduce heat and simmer for 15 min, until slightly reduced. Add the coconut milk, lime leaves, lime juice, fish sauce and palm sugar and simmer for 5 minutes. At this time pour some boiling water over the vermicelli and leave for about 5 minutes until soft. Drain.

Add meat or vegies to soup and simmer until cooked.

Add noodles to each bowl. Top with soup and then garnish with eggs, bean sprouts, tofu puffs and herbs. Serve with lime and shallots. Serves 4-6.

Friday, March 14, 2008

Smoked Fish with Vegetables, Matapha and Gari

The food from the Democratic Republic of Congo and Mozambique has some similarities. The use of peanuts. Coconuts. Dried and smoked fish. Leaves from cassava and other plants as a primary ingredient. Combine all these ingredients with some onions, chillies, palm oil, and garlic and you have a fusion of Mozambican Matapha and Congolese Pondu. Served with some pap, rice or gari and you have a delicious and filling dish. We prefer to add another dish, like smoked chicken with peanut sauce (DRC), or (very) spicy fried okra with prawns (Mozambique). Since I’ve made these dishes many times before, I opted for a new addition: fried smoked fish with vegetables.
So here they are.

Fried
Smoked Fish with Vegetables

Found in Dorinda Hafner's A Taste of Africa, purchased at Borders for $10!

Ingredients
500g smoked herring or mackerel
3 tbs peeled and finely grated ginger
½ cup vegetable or peanut oil
2 onions, minced
4 tomatoes, blanched, peeled and puréed
1 tbs tomato paste blended with ¼ cup water
2 red chillies, minced
250g green beans
½ teaspoon garlic salt (or salt and garlic)

Directions
Season the fish with salt and ginger. Heat the oil in a heavy-based pan, and sauté the fish (I used mackerel) until crisp and brown. Remove from the oil, drain, and set aside. In the remaining oil, add the onions and sauté until they are almost brown. Add the tomatoes, tomato paste, chillies, green beans, and garlic salt. Return the fish to the pan, cover, and simmer for 10 to 15 minutes, or until the sauce thickens.

Matapha / Pondu

This
is an amalgamation of many internet recipes that I no longer have because I wrote them in Rakas departing present, the cook's companion recipe journal.

Ingredients
6 handfuls Cassava (or Matapha) leaves
3 tbs palm oil
2 onions
8 cloves garlic
one piece of dried, salted or smoked fish, broken up
3 chillies (or more if they’re not very hot)
salt to taste

For Matapha add:
1 can coconut cream
1 cup roasted peanuts

NB: I’ve guessed the quantities as I normally make it by taste, so you may need to adjust.

Equivalent ingredients
Cassava or Matapha leaves have a distinct chlorophyll fragrance and taste, which is difficult to replace. If you can’t find them in Footscray or some other suburb of Melbourne which I don’t know about which has African grocers (sorry Melly, but I have no idea if you’ll have an option at all here), use 8 handfuls of spinach.

Palm oil is thick, red and sticky. Again, if you can’t find an equivalent, use peanut or ground nut oil.

For the smoked fish I tend to use half a small smoked fish (see picture), but you can also use a bunch of those tiny dried fish you get at Asian grocers (although not as fragrant).

Directions
If using fresh leaves, grind leaves in mortar and pestle with the garlic and chillies. Otherwise grind garlic and chillies then add frozen leaves. Place in a saucepan, cover with water and cook until almost dry (approximately ½ hour). Add all remaining ingredients and cook for one hour, adding water if necessary. For Matapha, once cooked, blend until almost smooth (it should be the consistency of a pumpkin soup). The dish should be nutty and smoky, but not spicy despite the inclusion of chillies.

Gari

Again, taken from Dorinda's cookbook

Gari is a new addition to my African recipes, and is delicious. It is actually a Portuguese and/or French dish which has been adopted by the Ivory Coast (I think it might be a Portuguese dish adopted by French colonies). It is almost like a cross between polenta and bread, and is very simple to make. If you can’t find it in African or Portuguese / Spanish grocers, use polenta, rice or mashed potato instead (I’ll explain pap another day).

Ingredients
Farine de Manioca (in French, or Farinhe de Mandioca in Brazil, or Farinha de Mandioca in Portugal, or dried ground cassava)
Water
Salt

Directions
Put 2 cups gari in a bowl and add enough lightly salted water to cover it completely (I also give it a little stir). Let is stand for 10 minutes, or until the gari absorbes the liquid and swells (it will swell to about twice its original size). Fluff the gari with a fork and serve with the fish and the Matapha poured over it.


Serves 4